What is Zapier?
Zapier is an online automation tool that connects different applications such as Google Contacts, Gmail, Outlook, Salesforce, HubSpot, and more to automate repetitive tasks.How does Zapier work?
Zapier operates through two primary components: Actions and Triggers. Triggers: A trigger in Zapier is an event that starts a workflow, known as a Zap. It’s the ‘this’ part in an ‘if this happens, then do that’ equation. For instance, receiving an email in Outlook could be a trigger. Actions: An action is what Zapier does after a trigger is activated. It’s the ‘do that’ part in the ‘if this happens, then do that’ equation. Following the previous example, an action could be saving the email body as a note in Dex. Together, a trigger and an action form a complete Zap. For instance, “If I receive a new email in Gmail (Trigger), then save the email body in Dex(Action).”What are the supported actions/triggers for Dex?
Currently, Dex only integrates actions (i.e. the “do that” part of the equation) into Zapier.💡Connecting Dex with Zapier
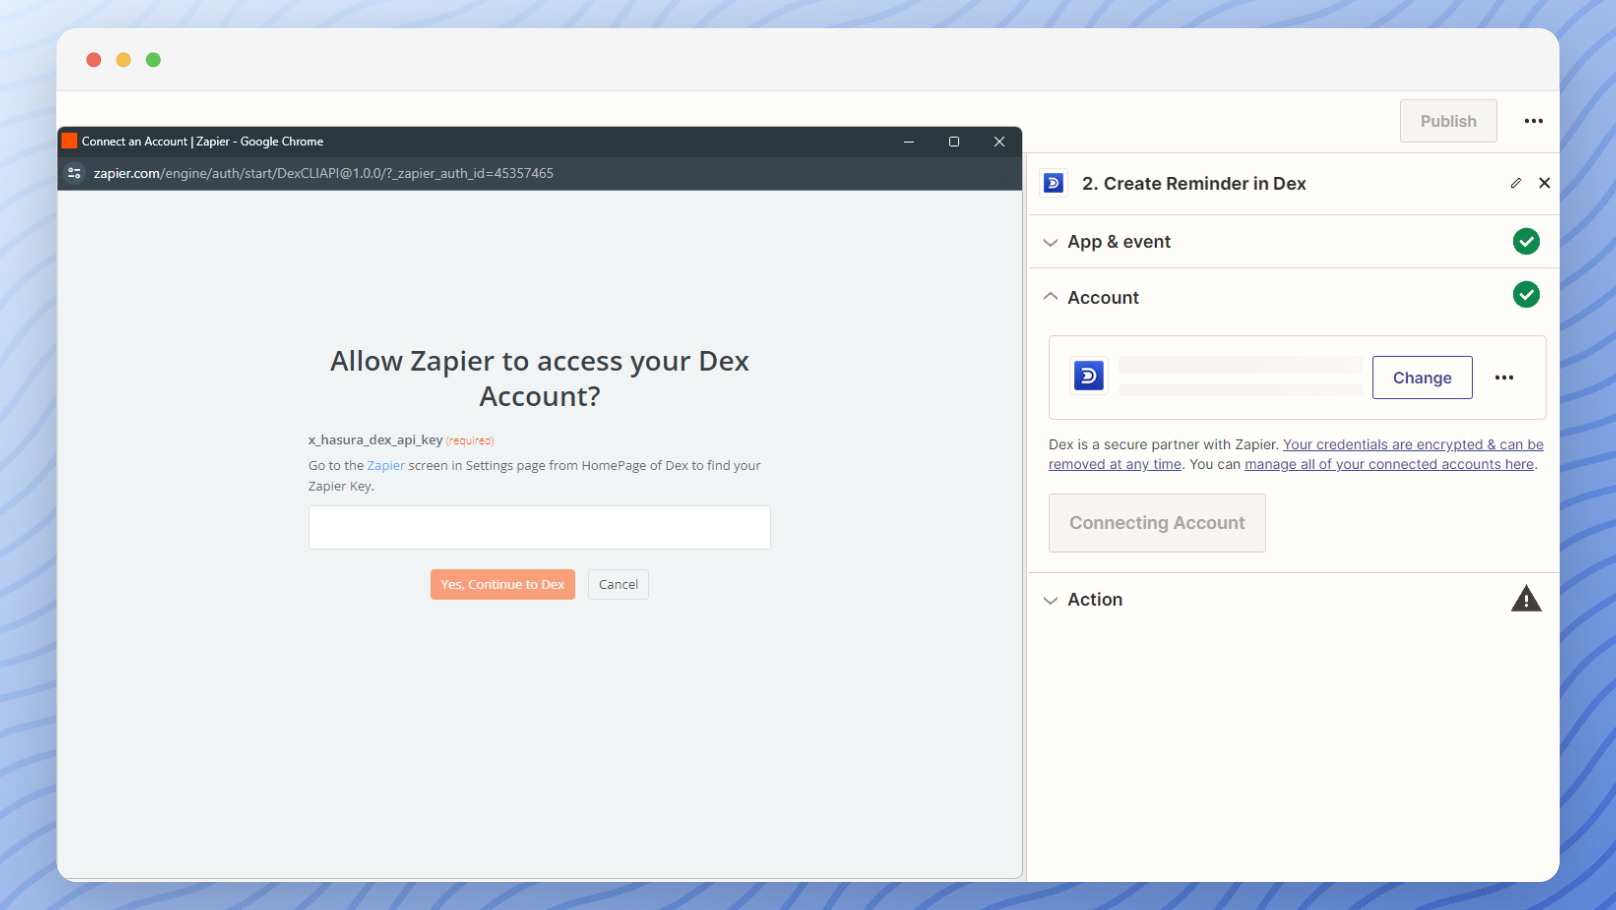
From the Zapier page of your Dex account, you can copy and paste your Zapier Key to make the connection. Clicking on ‘Connect Zapier’ logs you into Zapier using your Dex account.
👥 Creating a Zap to Manage Contacts in Dex
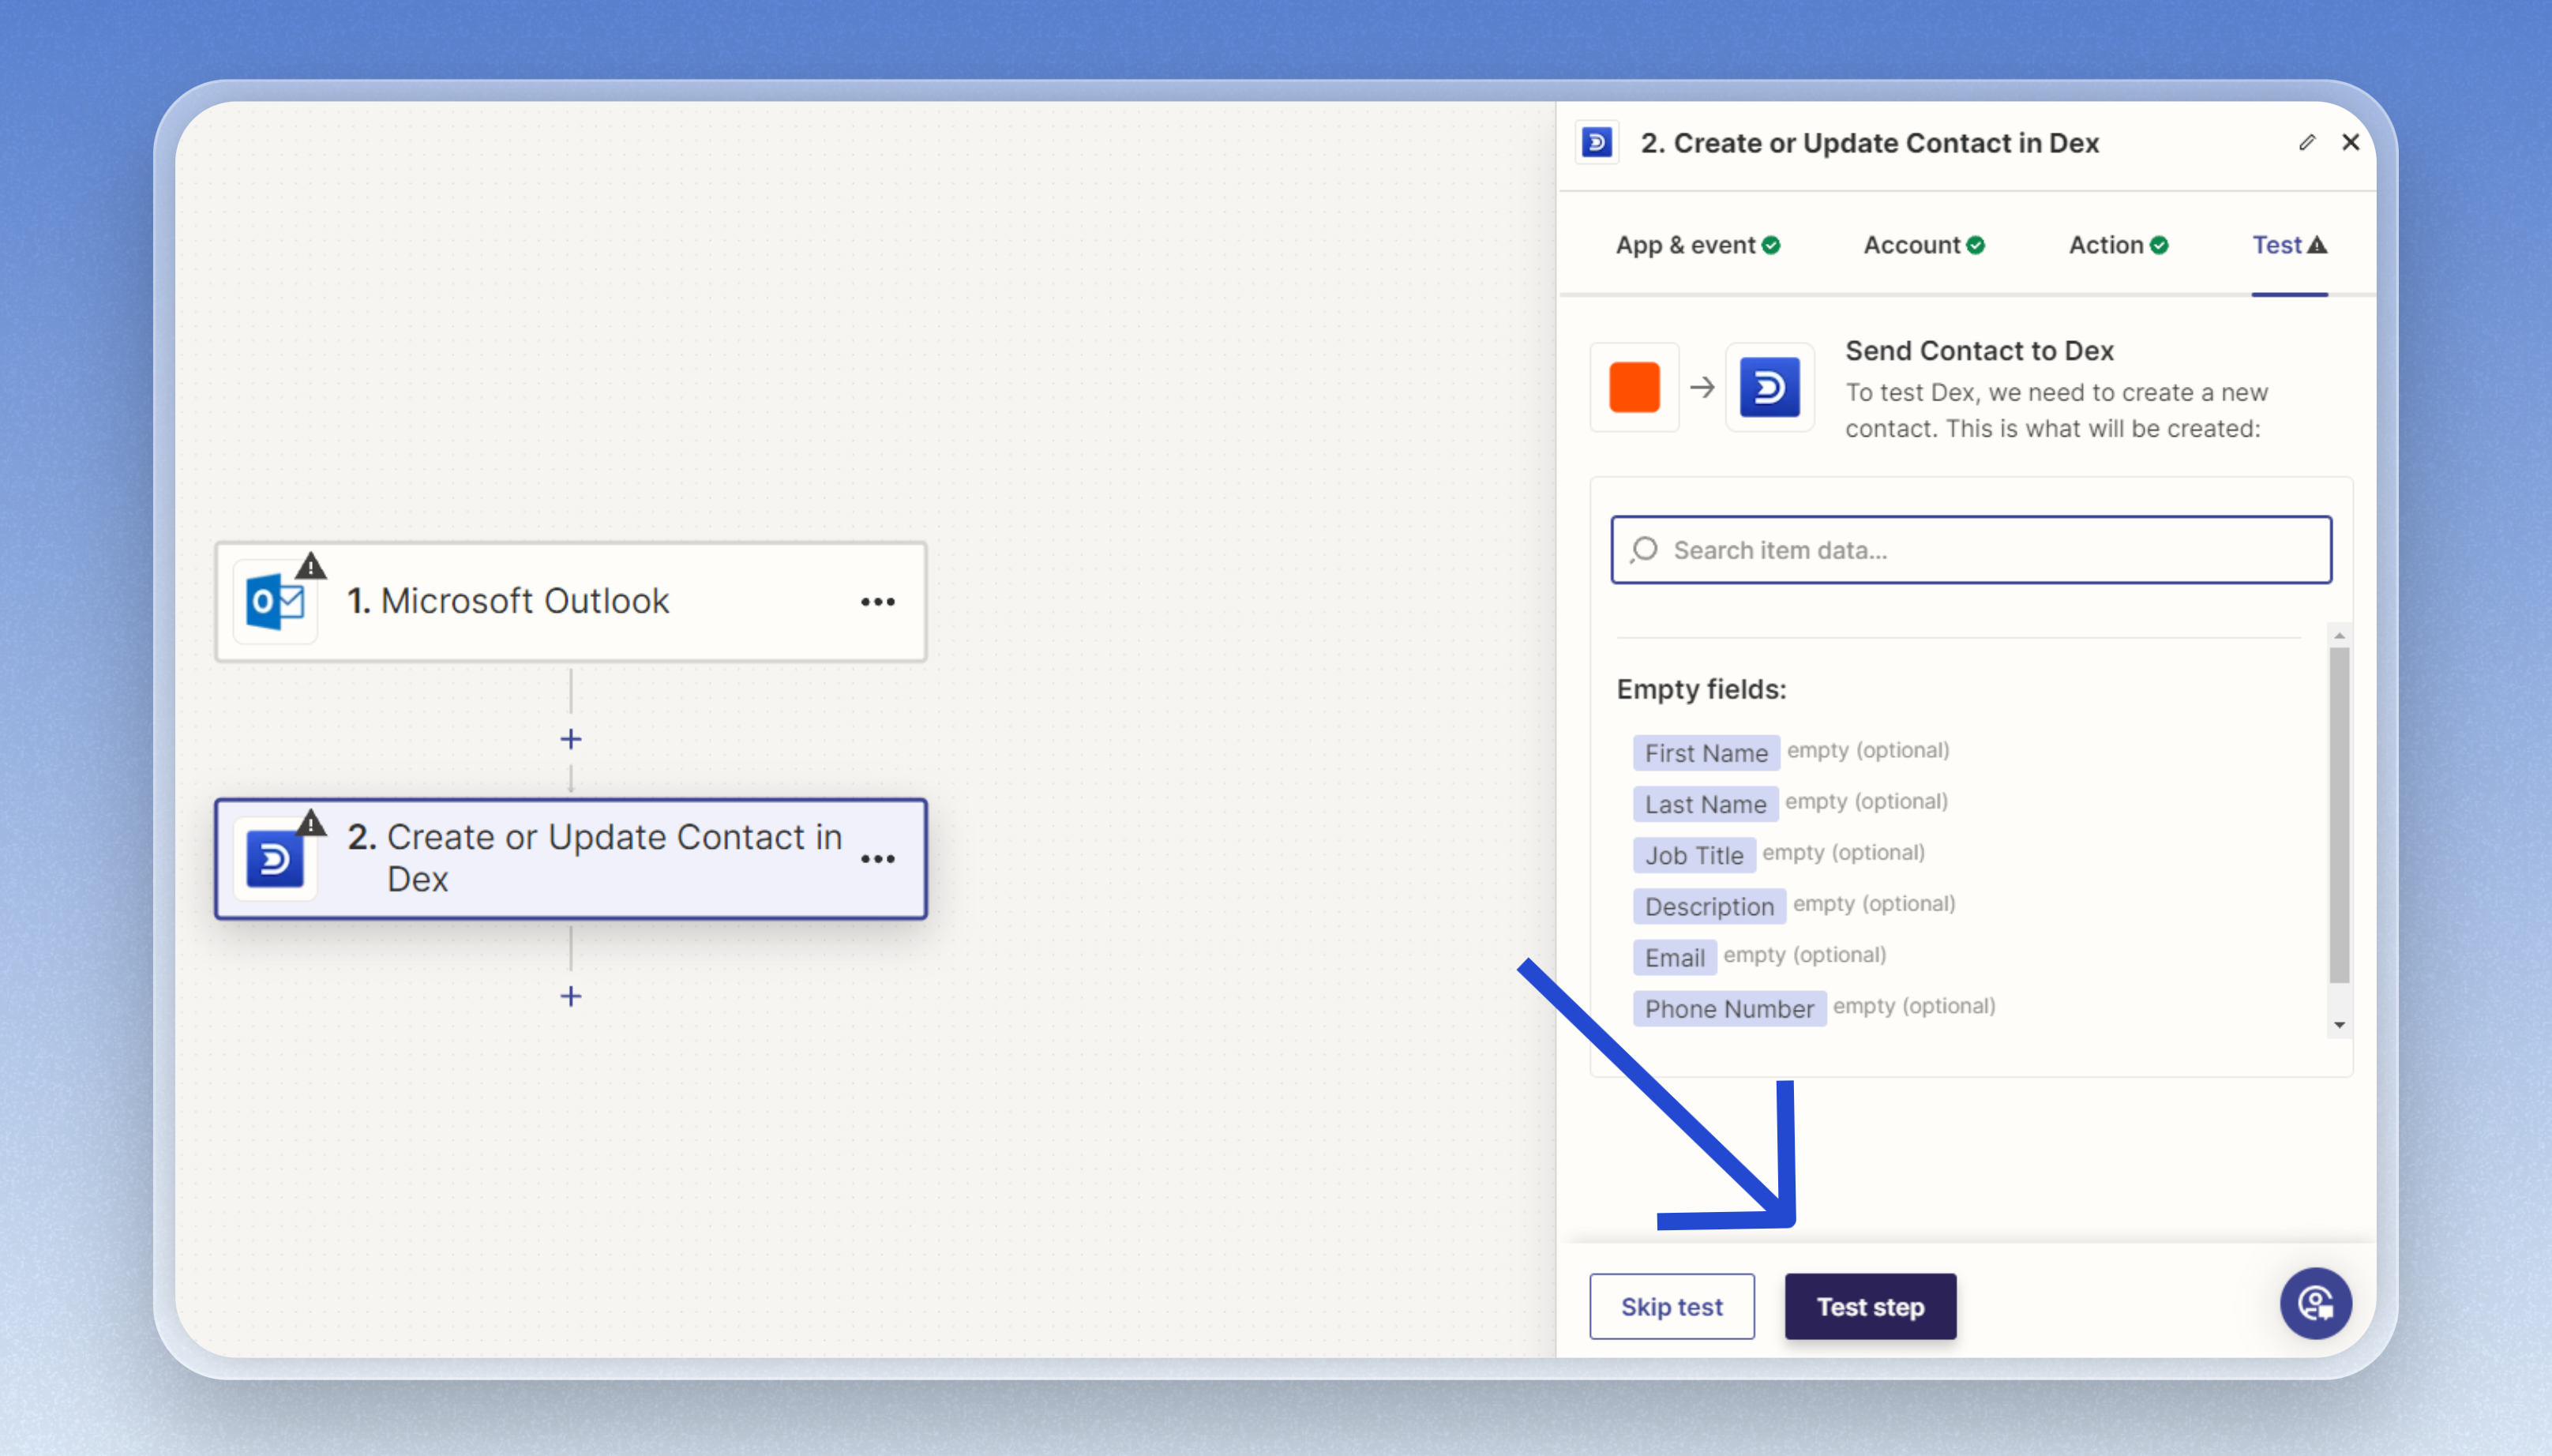
Setup Authentication and Configure

- Choose the “Create or Update Contact” action.
- Configure the following fields:
- first_name
- last_name
- email (multiple emails can be included)
- phone_numbers (multiple numbers can be included)
- job_title
- description
If the email exists for an existing contact, we’ll update their details. If no contact matches the email provided, we’ll create a new one with the given field details.
📝 Creating a Zap to Insert Notes in Dex
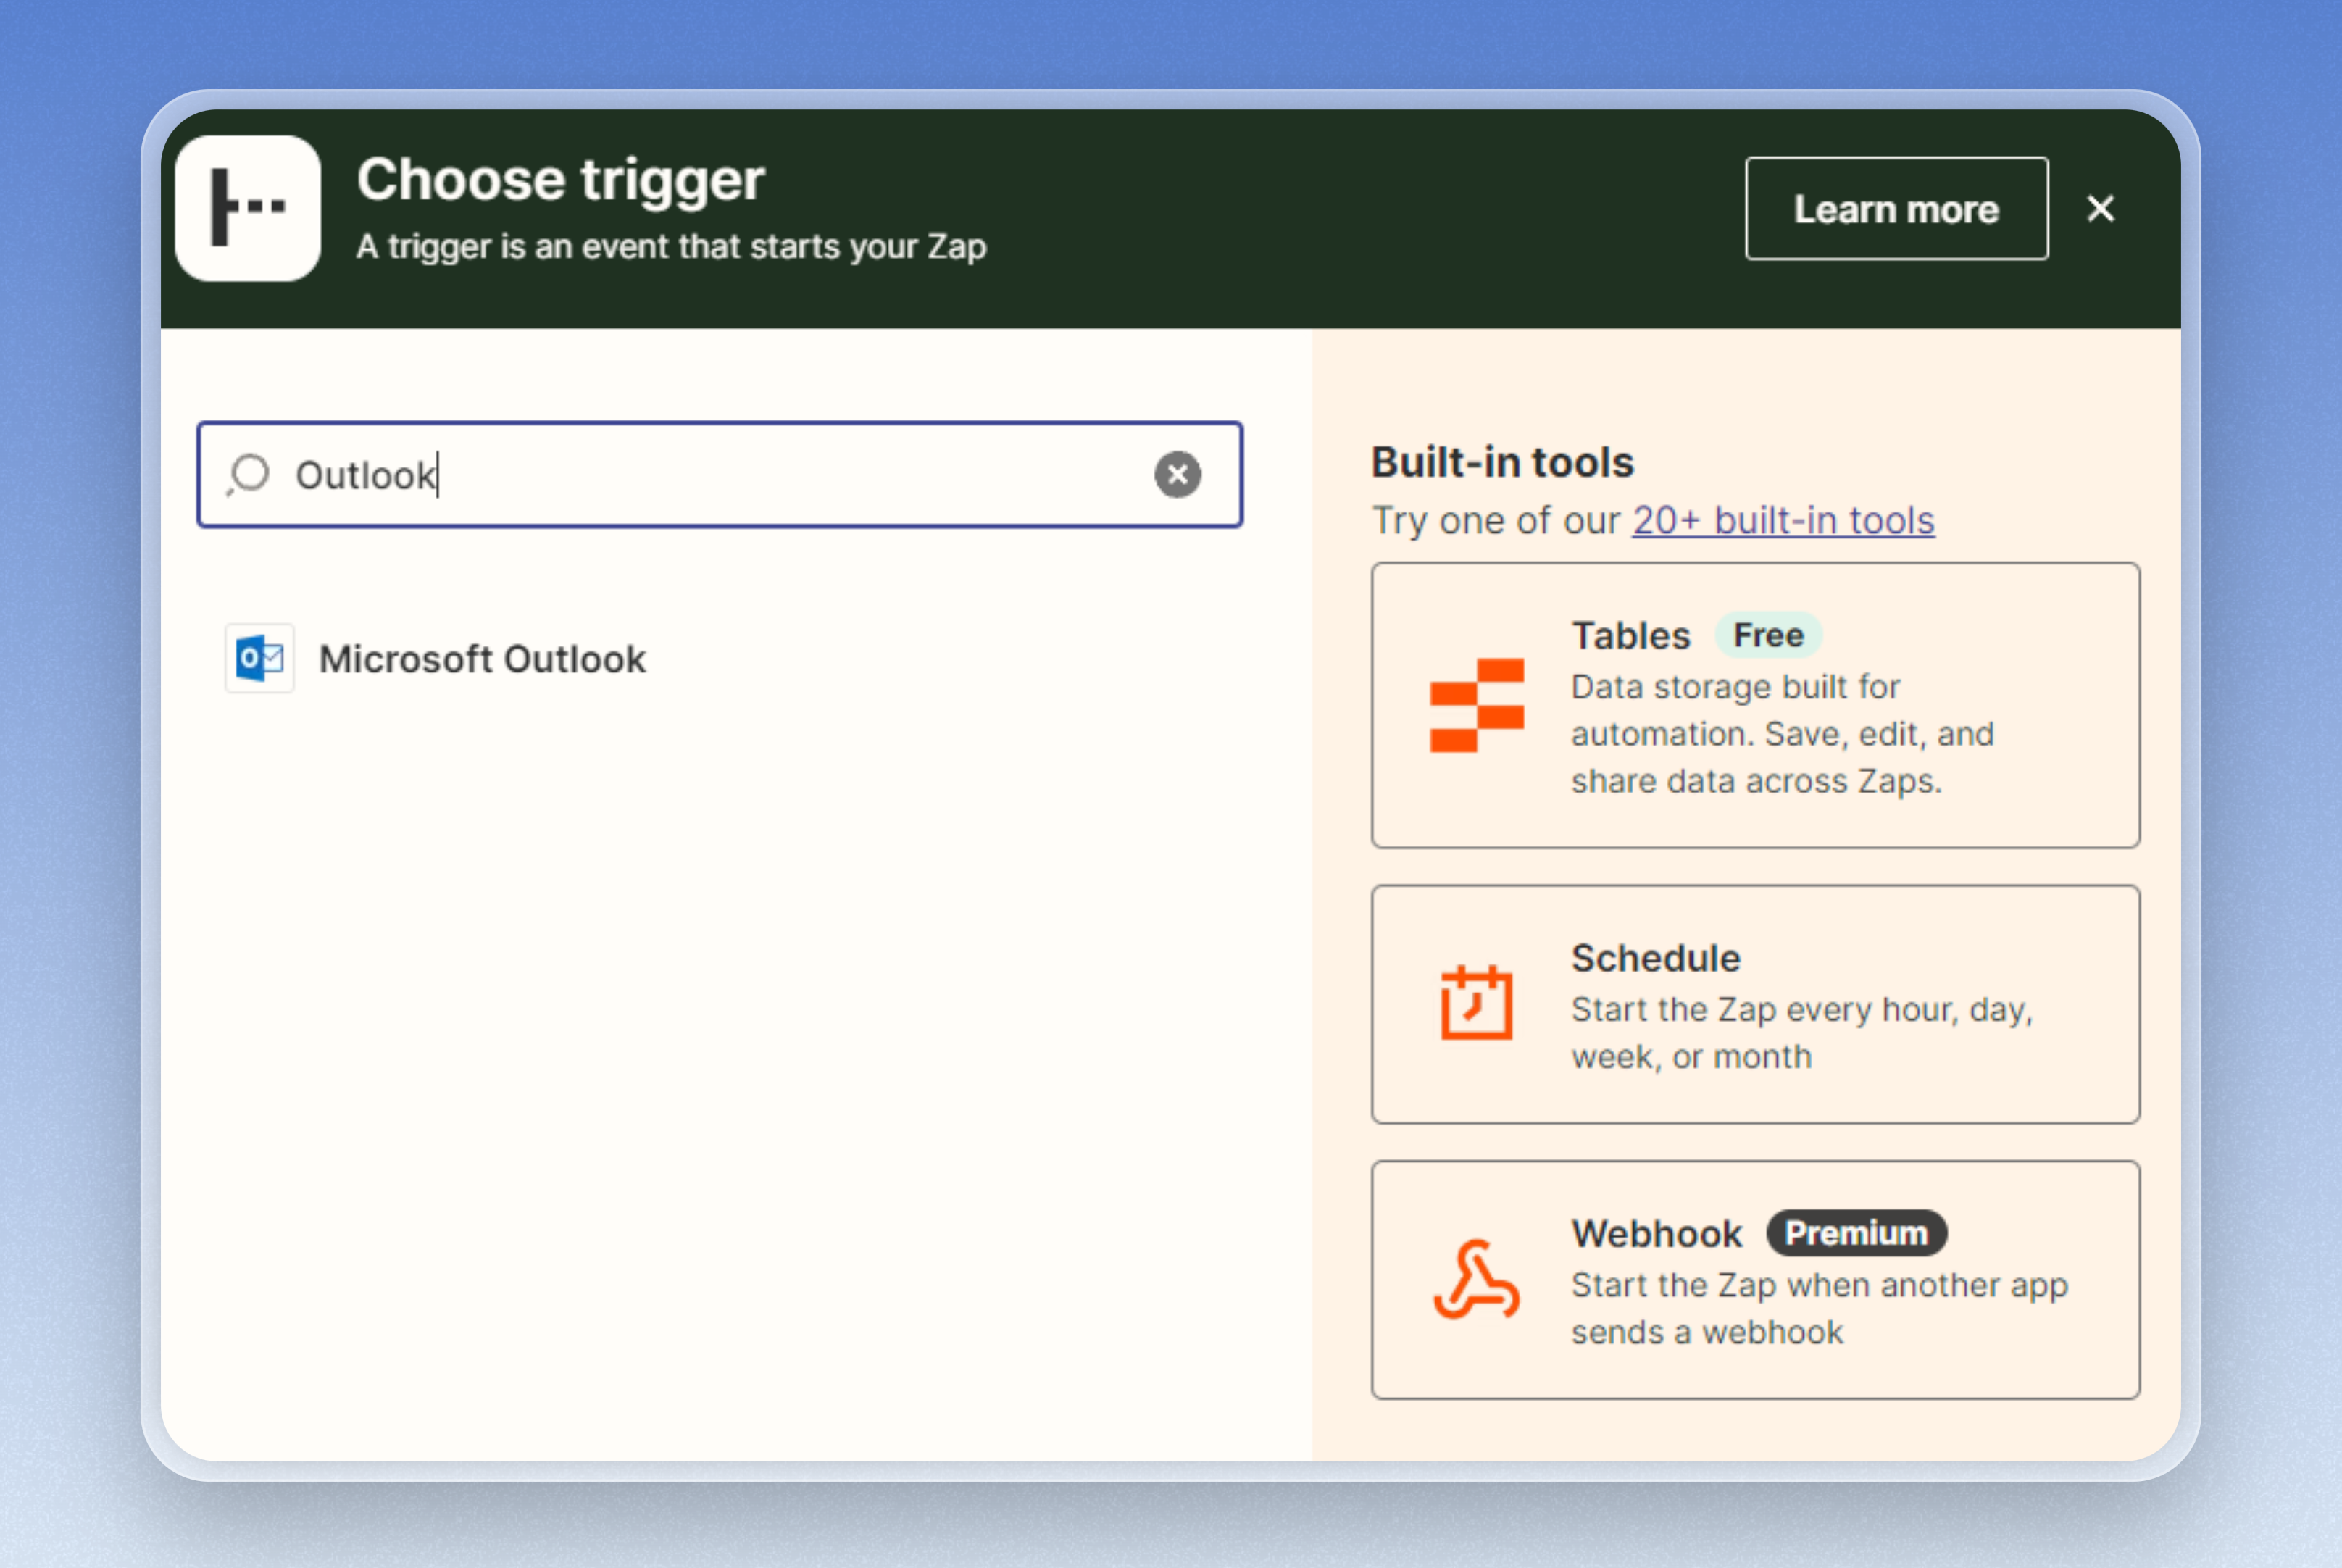
Add a Trigger
Start by adding a trigger based on a relevant event, such as “New Email in Outlook/Gmail.”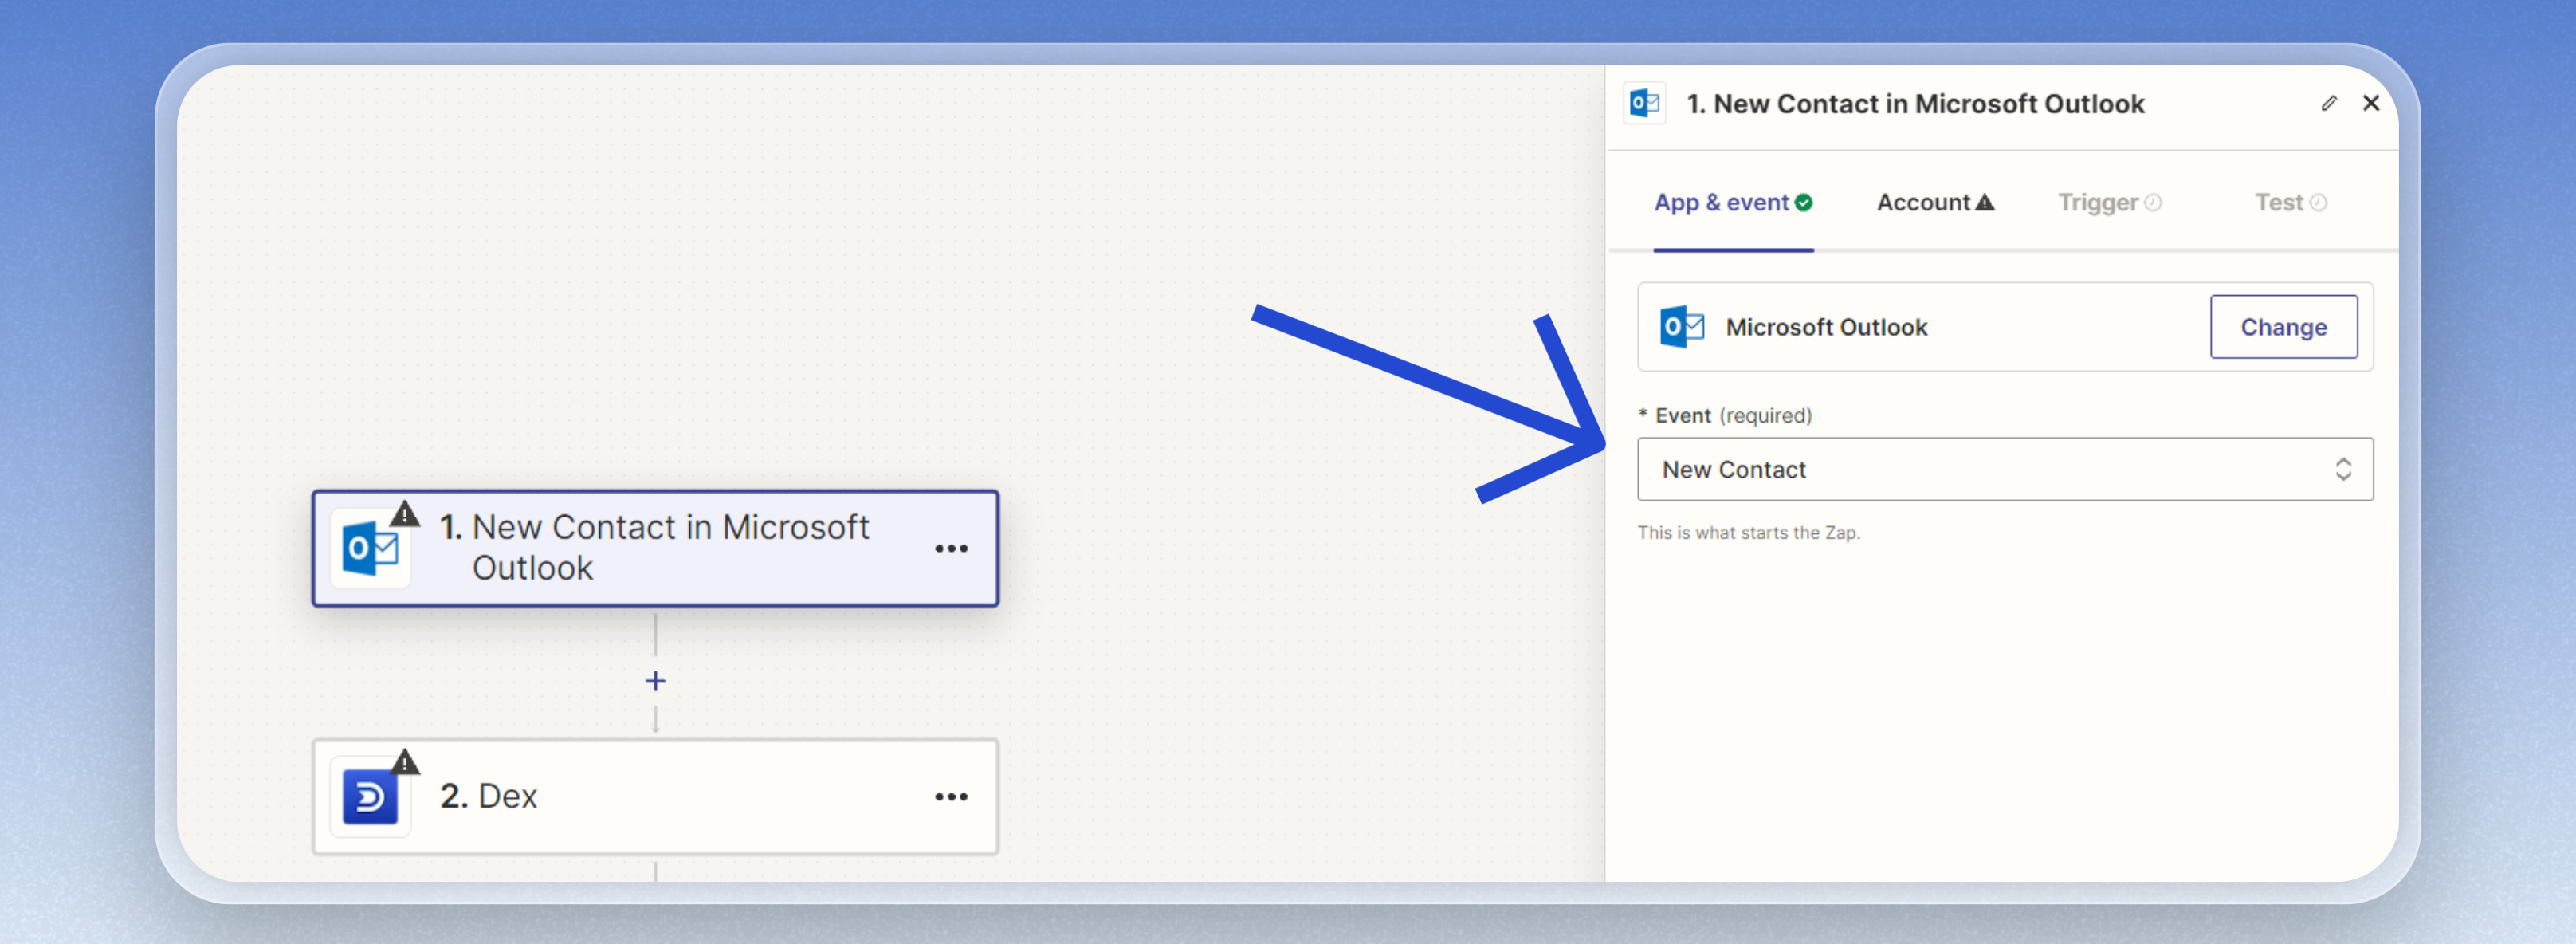
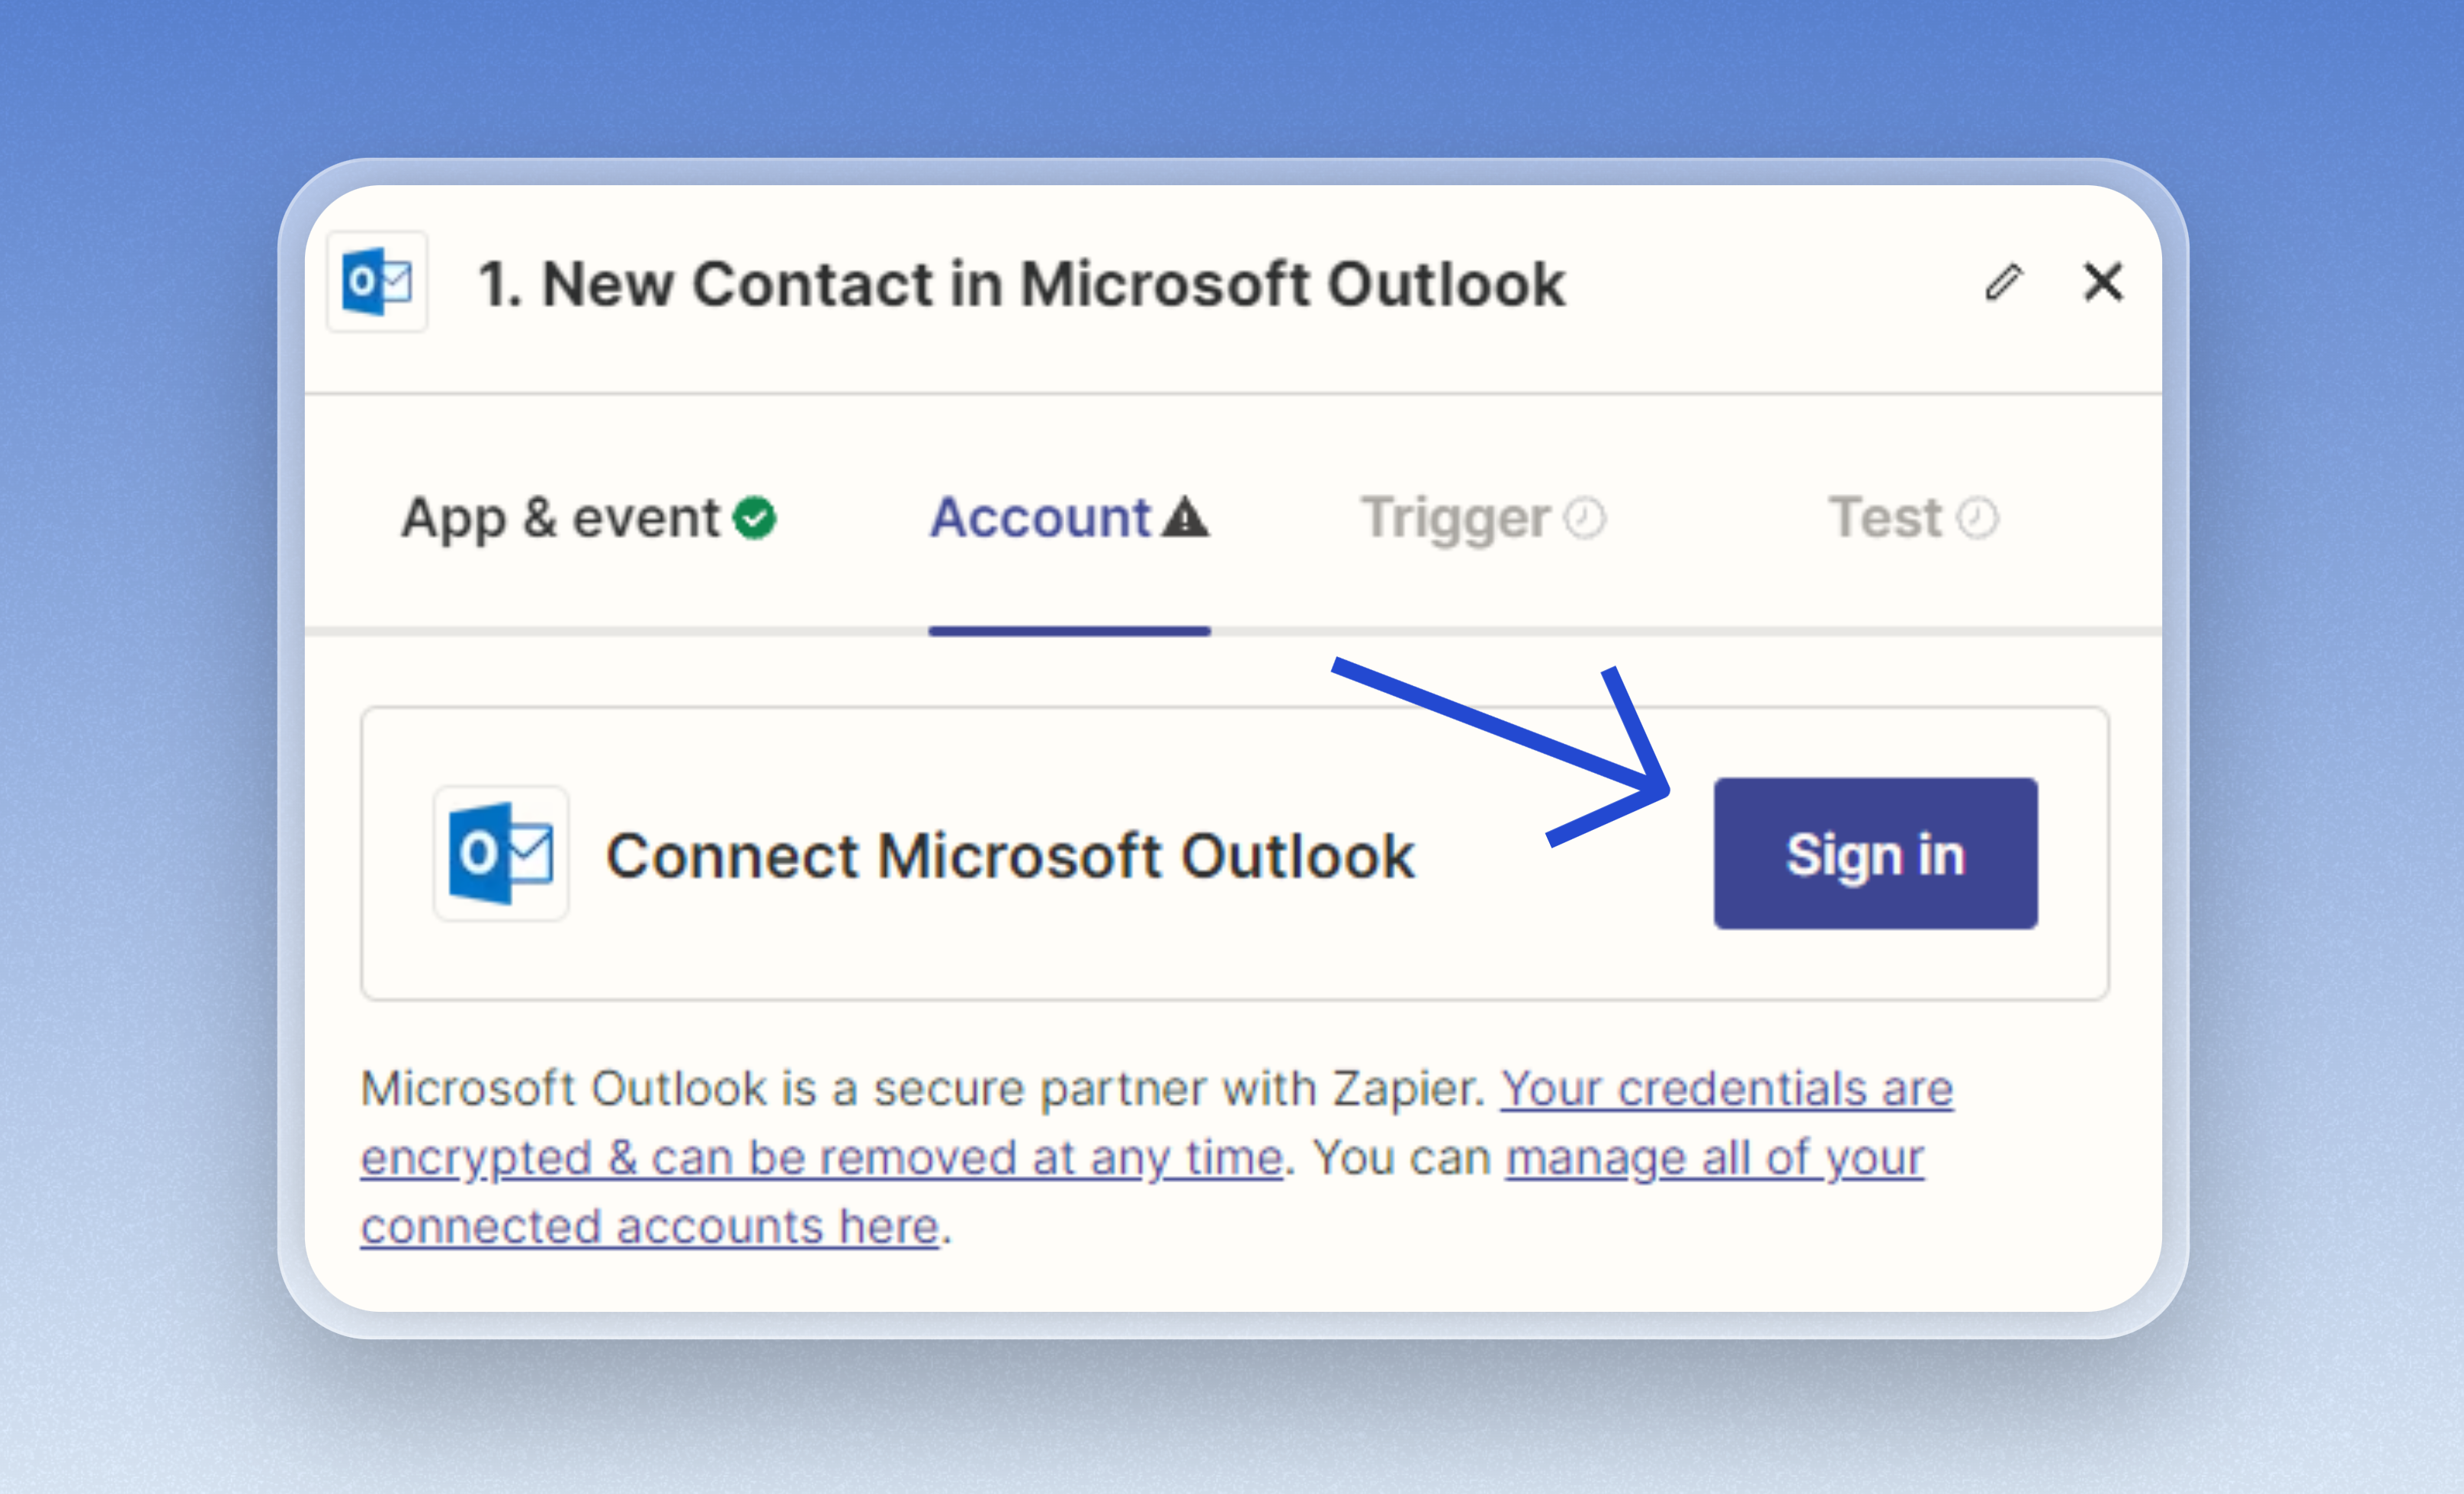
Setup Authentication and Configure
- Authenticate your email account (Outlook/Gmail) to allow Zapier to access and trigger based on new emails.
-
Configure the trigger settings, such as choosing the specific email folders or labels you want to monitor.
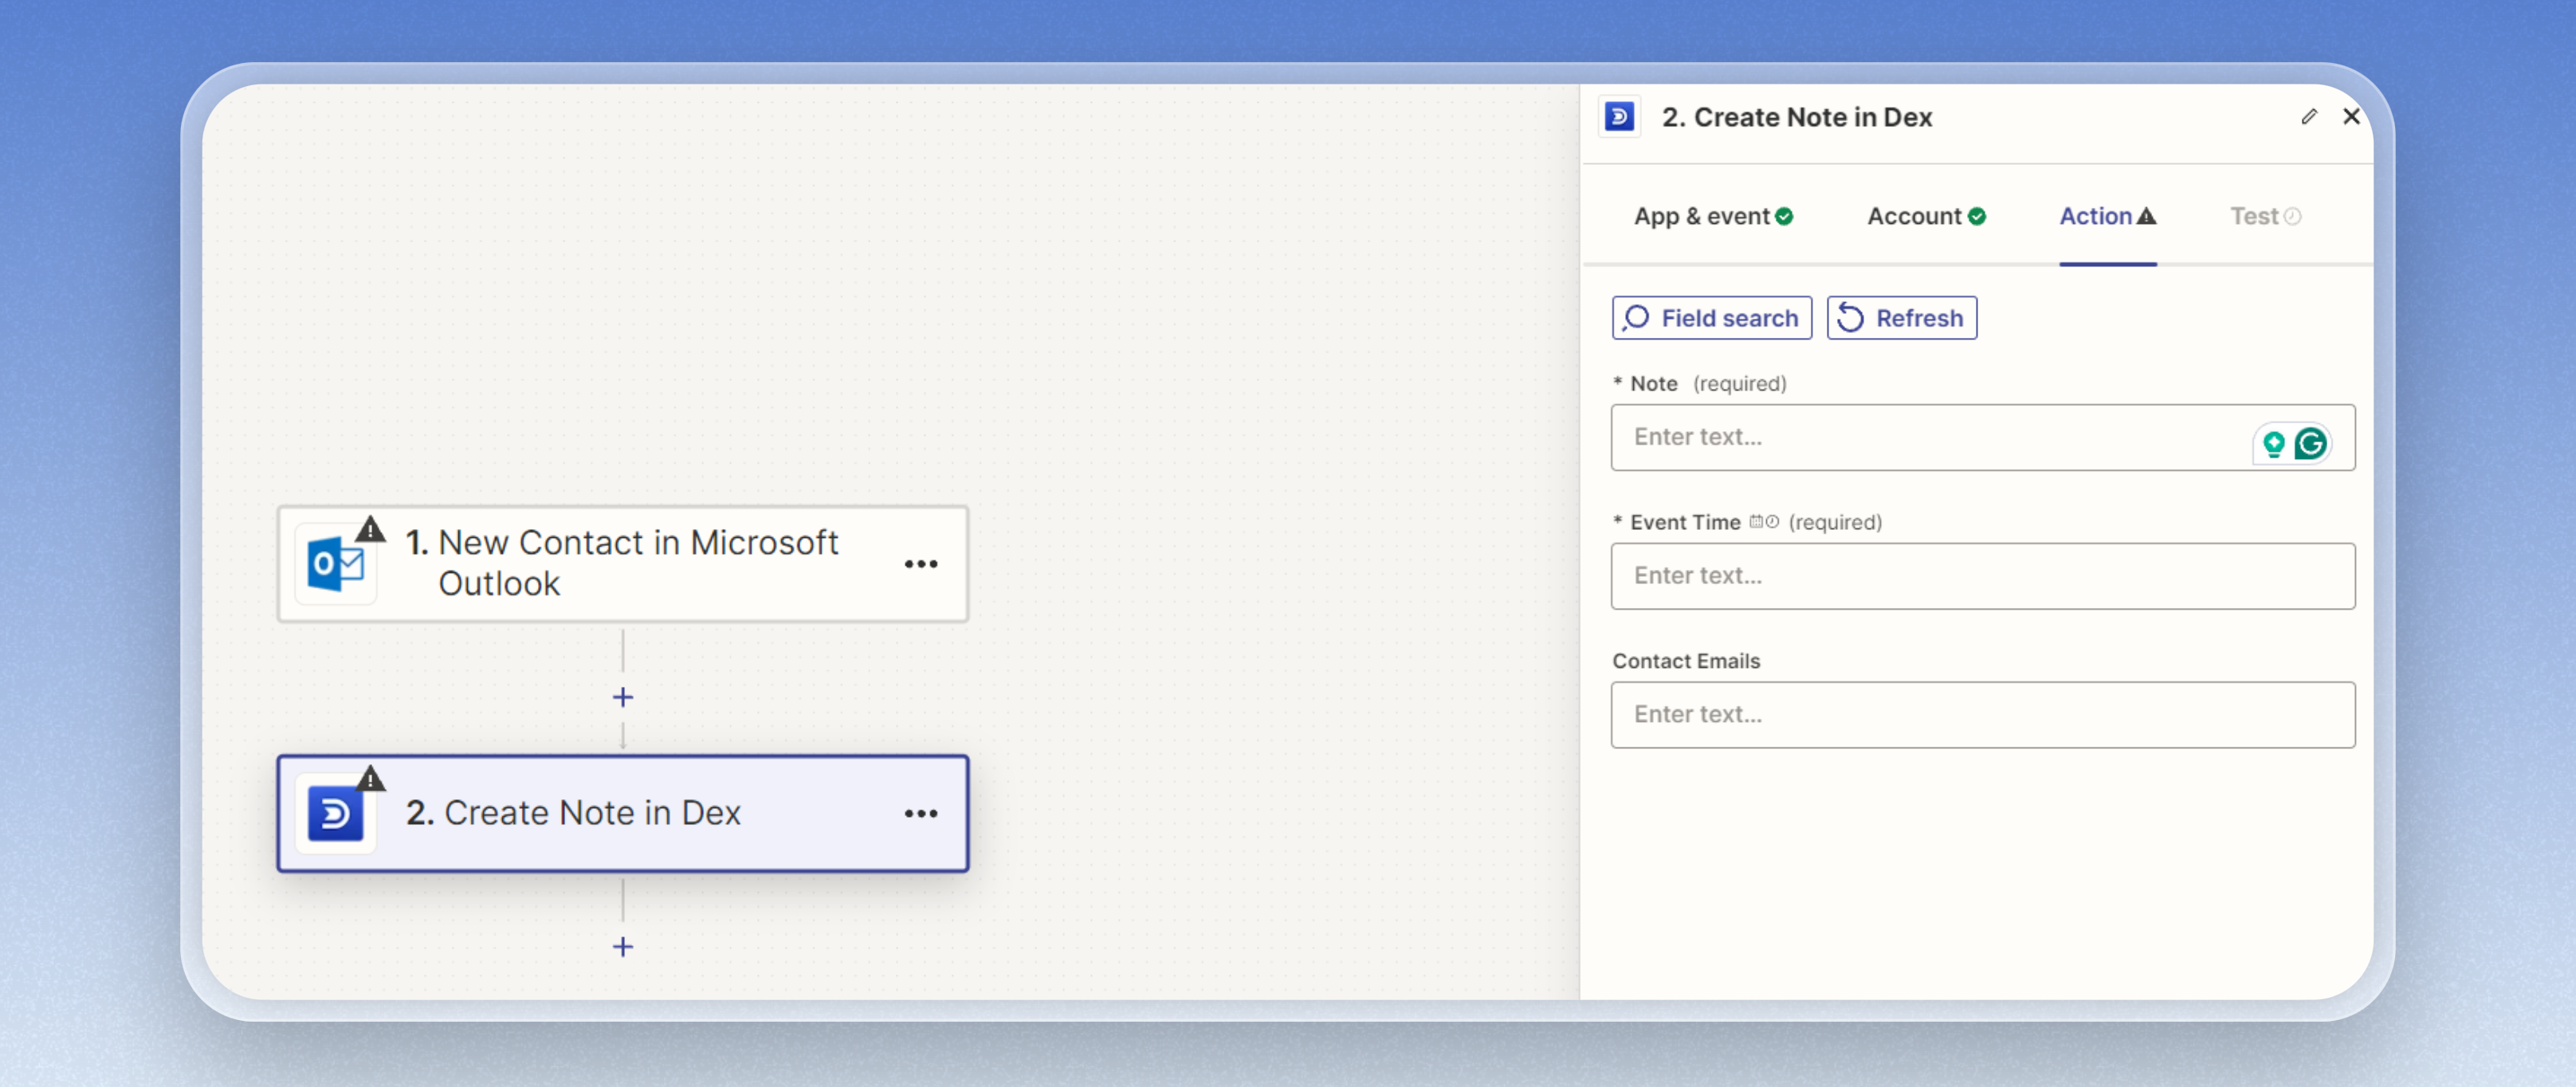
Create Note in Dex
- Add the action “Create Note” to insert notes into Dex.
-
Configure the following fields for the note:
- Note Content: Use the email body as the content for the note.
- Event Time: Set it to the received time of the email.
-
Emails Field: Include the emails of cc, bcc, and senderEmailAddress. These emails will be associated with the note.
📃 Creating a Zap to Insert Reminder in Dex
Add a Trigger
Start by adding a trigger based on a relevant event, such as “New Calendar Event in Outlook/Google Account.”
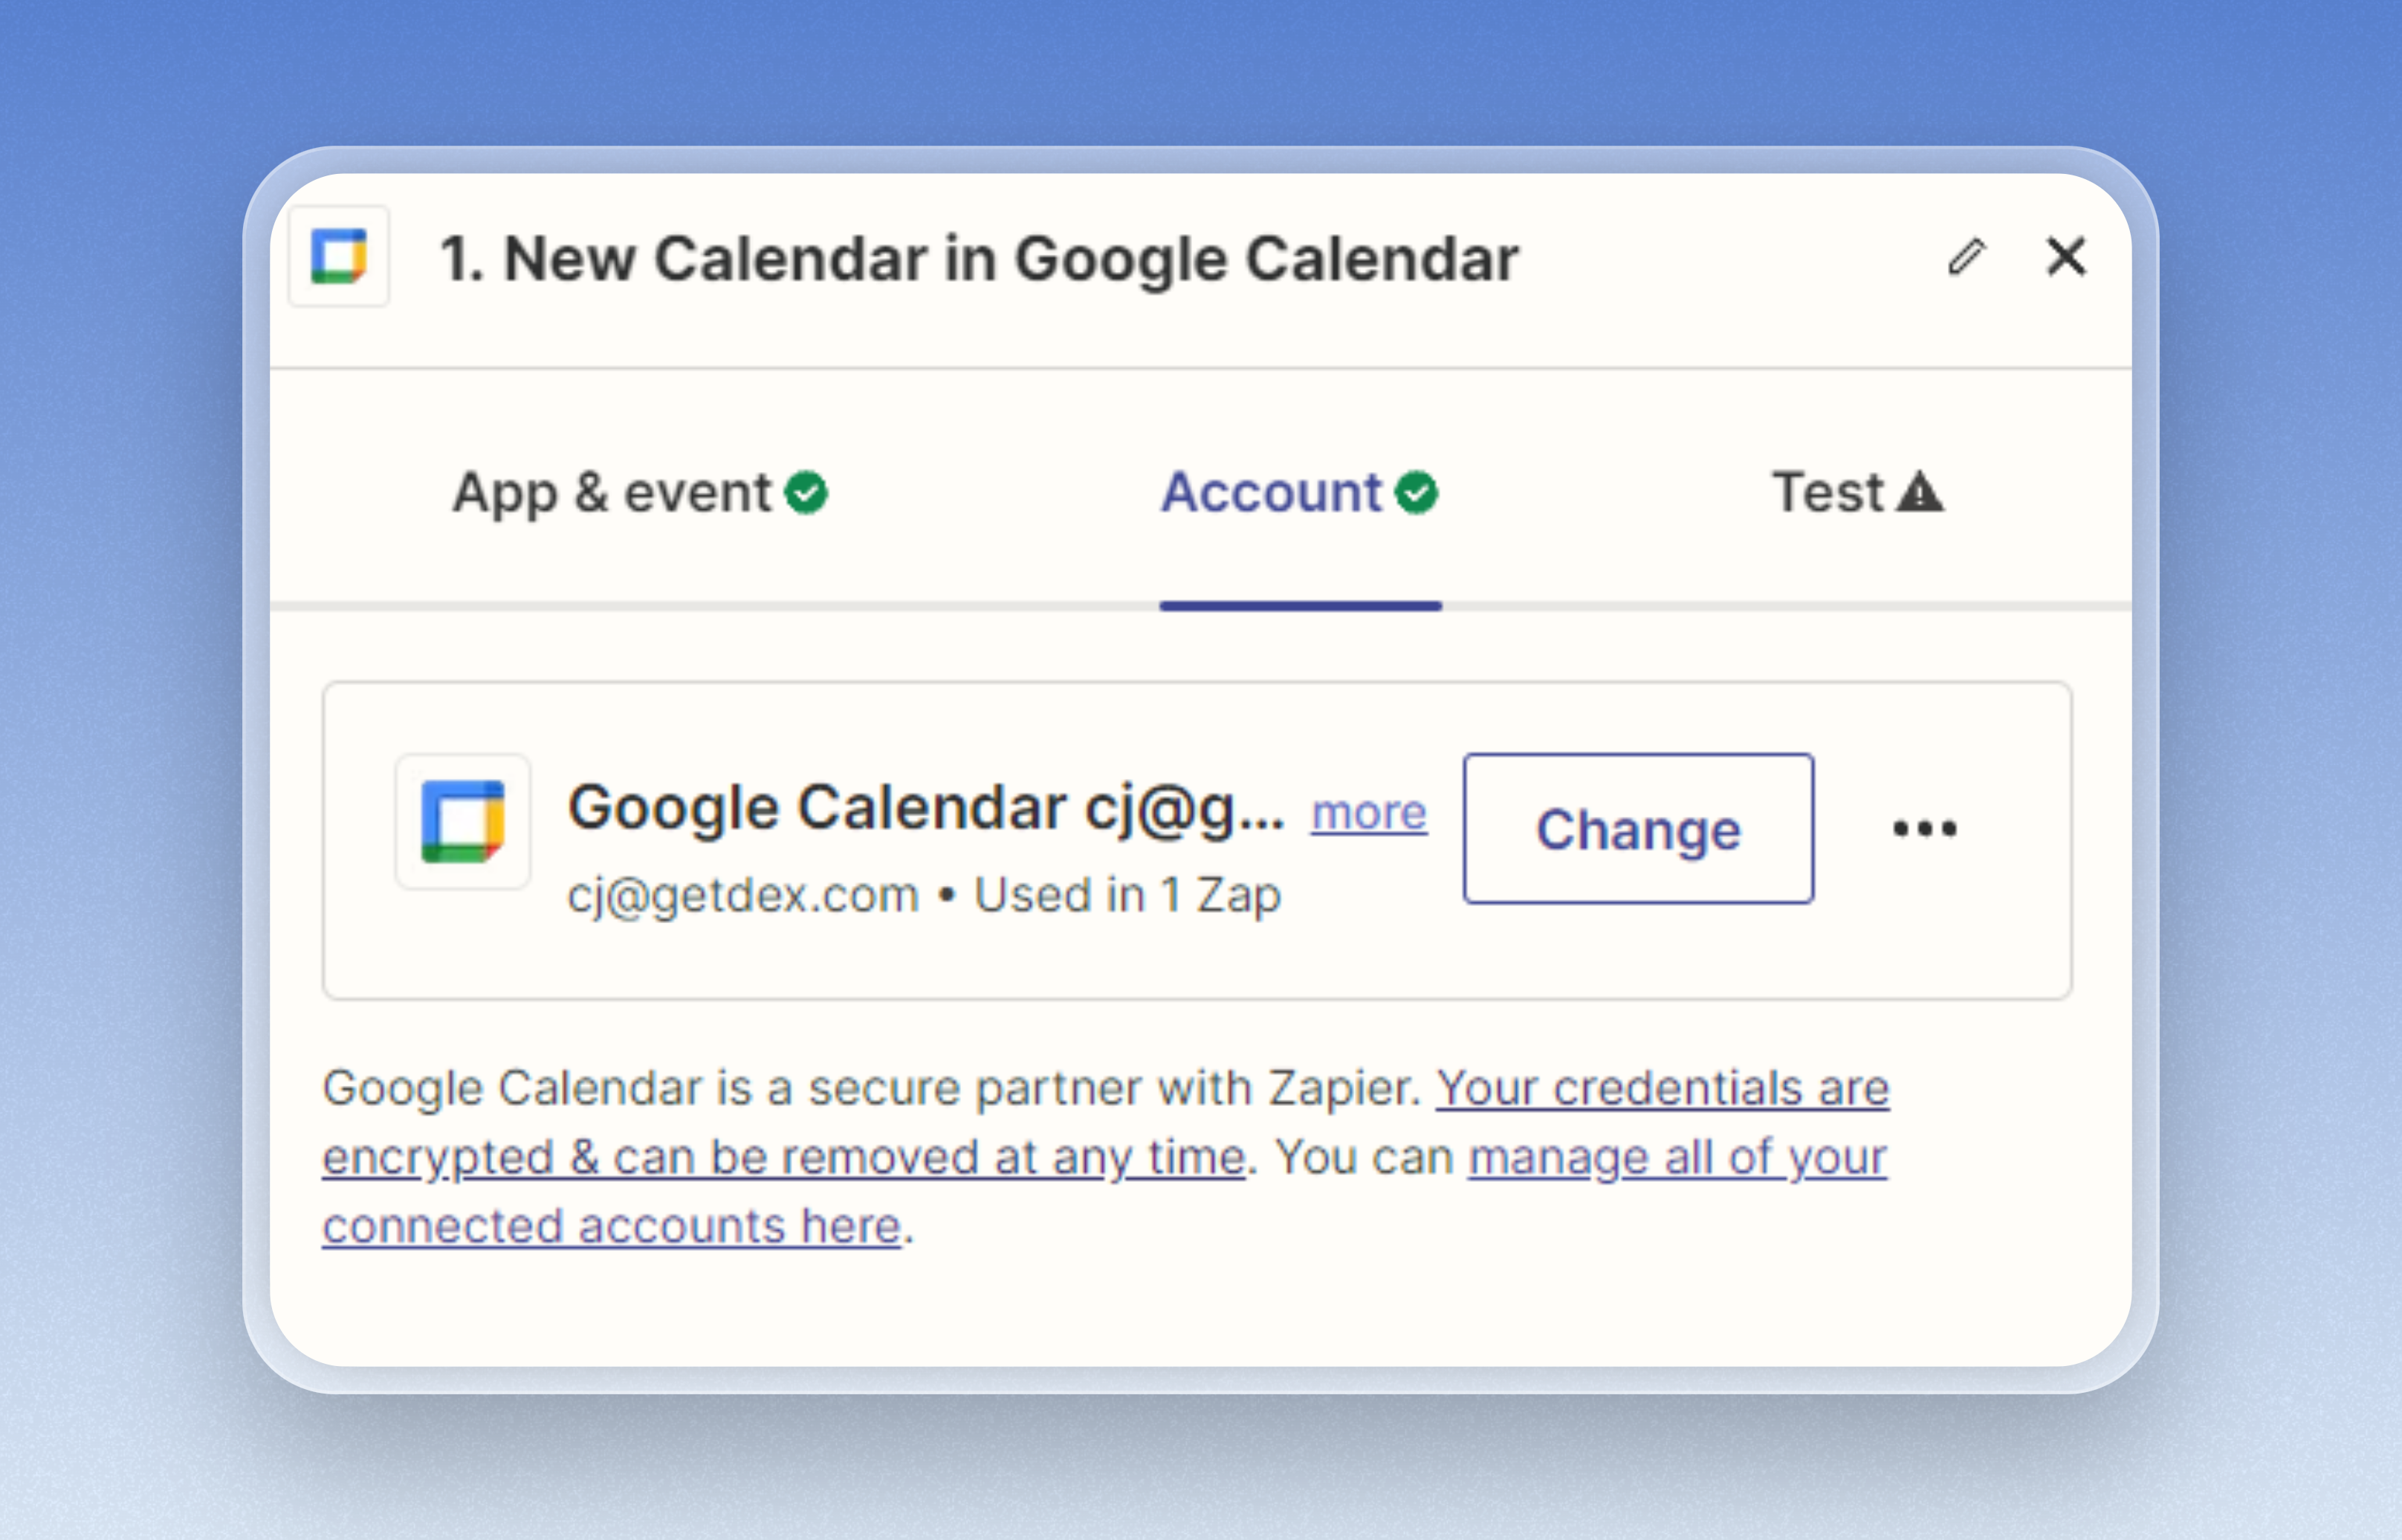
Setup Authentication and Configure
- Authenticate your Calendar(Outlook/Google Account) to allow Zapier to access and trigger based on new calendar events.
-
Configure the trigger settings, such as choosing the specific calendar you want to monitor.
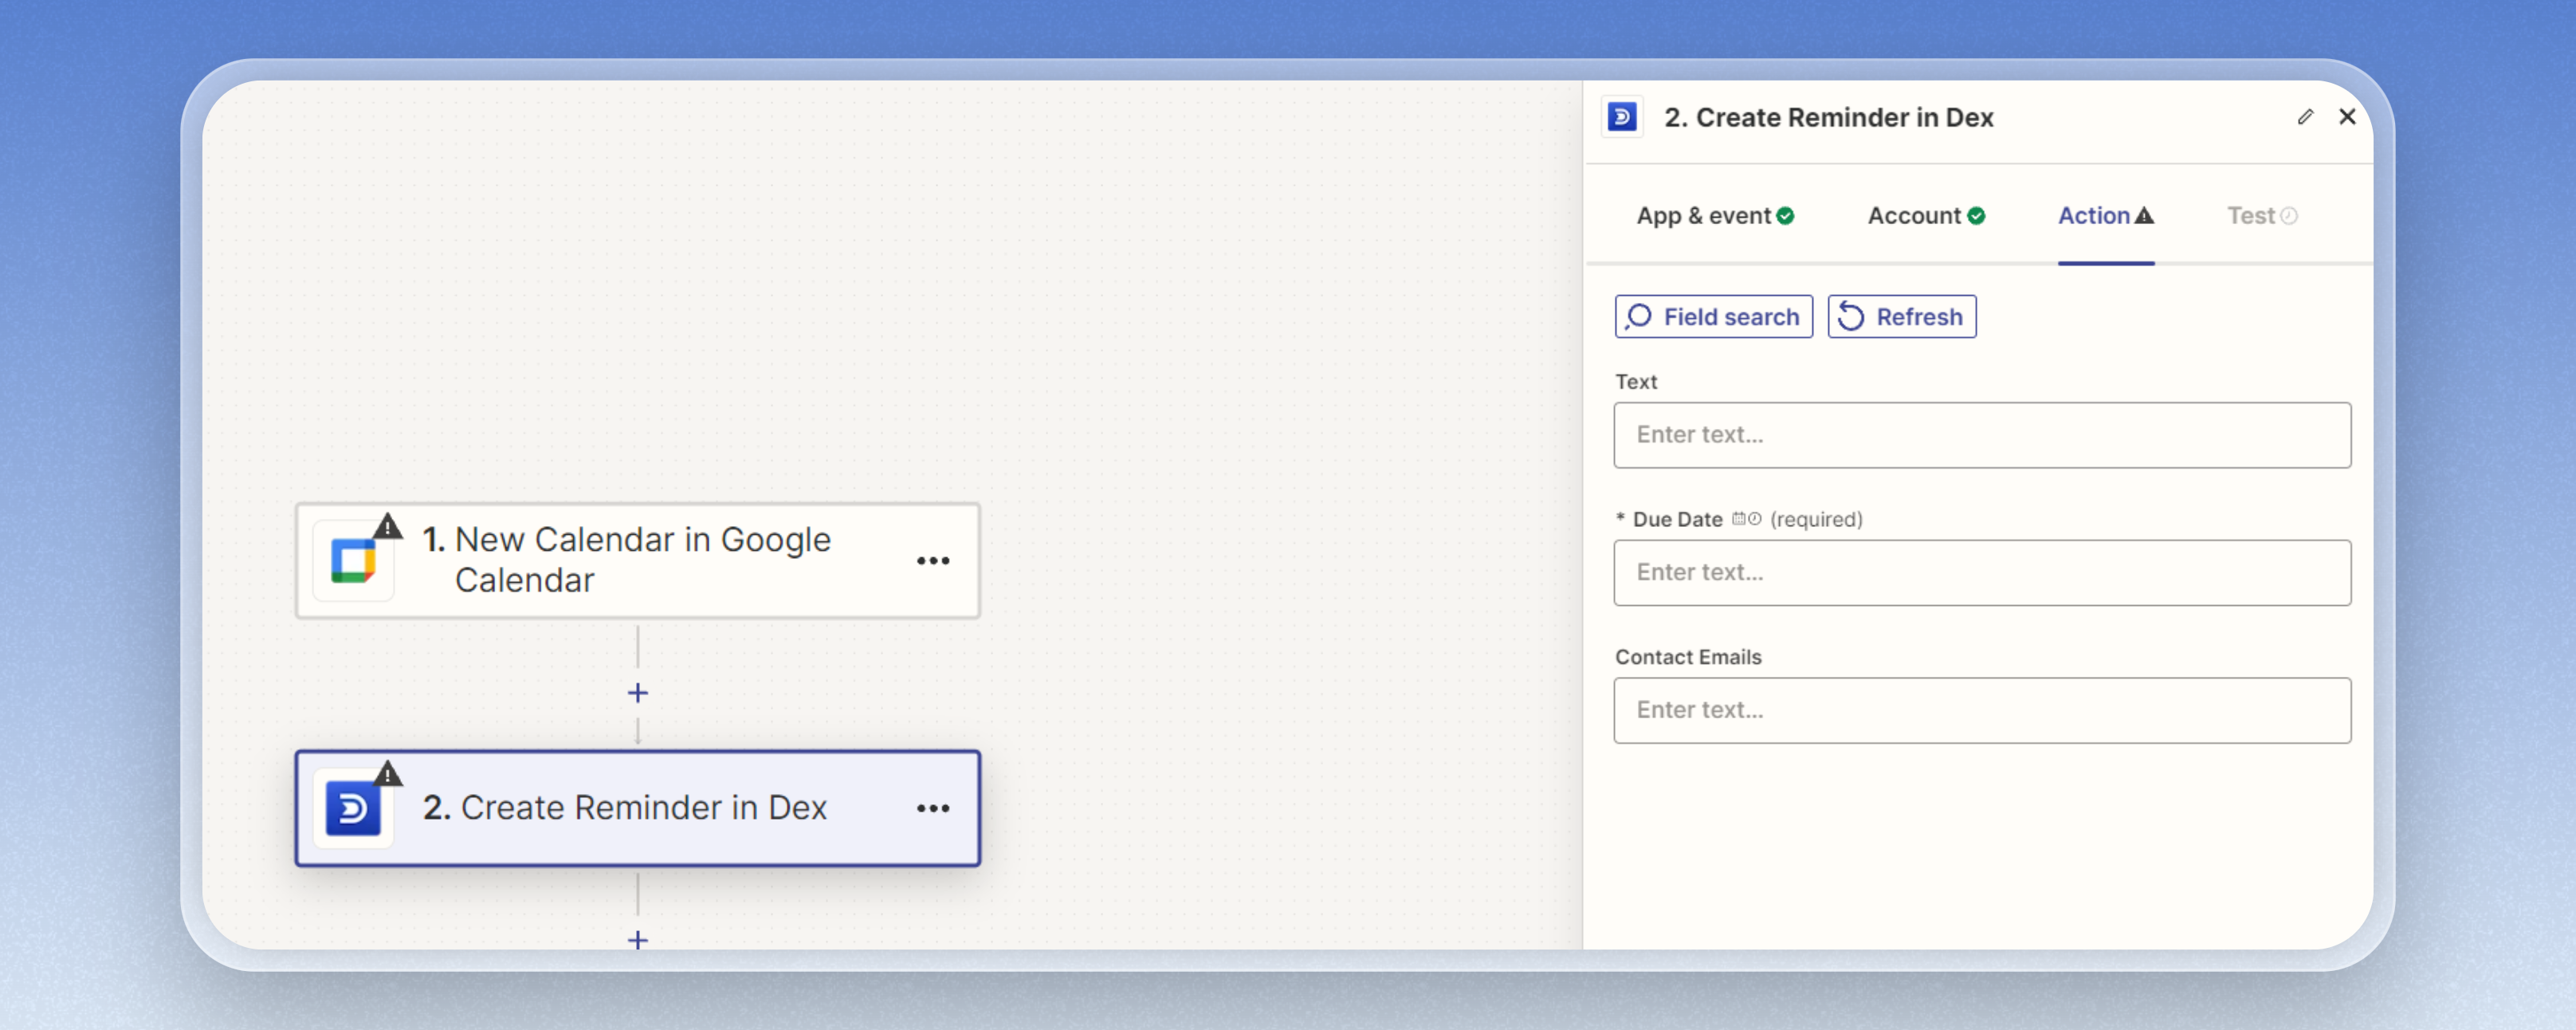
Create a Reminder in Dex
- Add the action “Create Reminder” to insert reminders into Dex.
-
Configure the following fields for the reminder:
- Text: Use the Calendar Event body as the text for the reminder.
- Due Date: Use the event start time as the due date for reminder.
-
Contact Emails: Use the attendee’s email addresses to include in the reminder.